
-
Created by
 Unknown User (rylands), last updated on Aug 31, 2018
3 minute read
Unknown User (rylands), last updated on Aug 31, 2018
3 minute read
Setting up your printer MacBook Sierra and above, WiFi printing.
Step-by-step guide
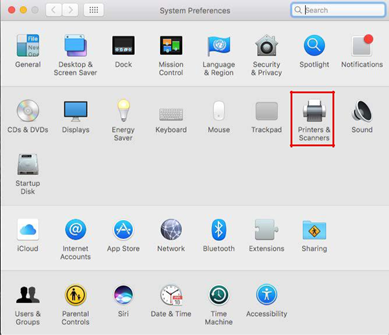
Open System Preference and click on Printers & Scanners
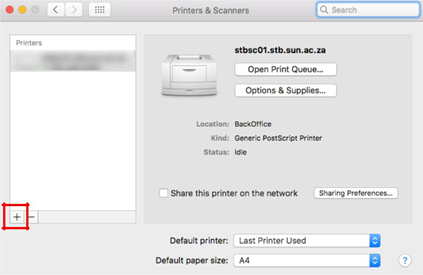
- Click on the + icon
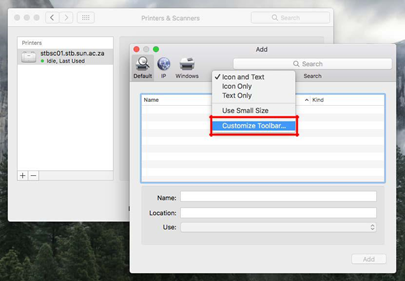
If there is no advanced icon available, do the following: - On your keyboard hold ctrl + left/right click to get toolbar options.
- Navigate to Customize Toolbar…
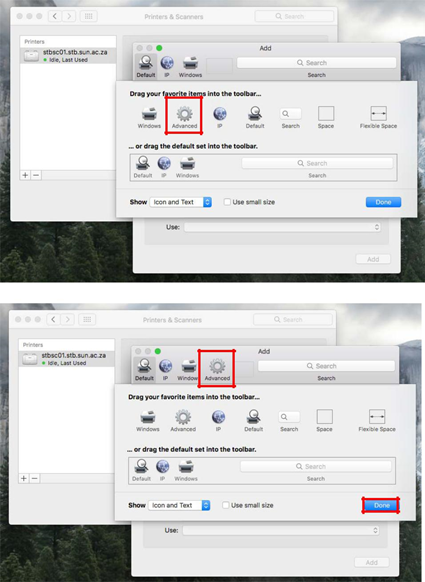
- Click and drag the advanced icon from the list given to the menu and select Done.
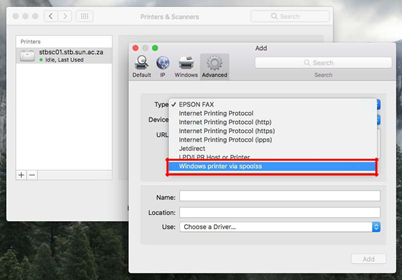
- In the Type section, choose Windows printer via spoolss
In the URL section, enter one of the following (see list):
Ensure that the printer Name is set to STB SecurePrint
In the Use section, choose Generic PostScript Printer
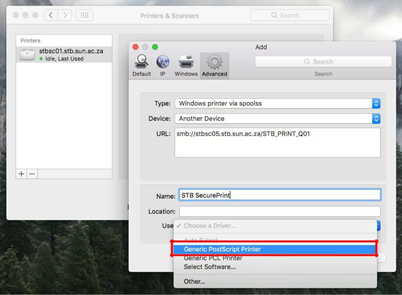
Staff ‐ //stbsc01.stb.sun.ac.za/STB_PRINT_Q01
FHARGA ‐ //stbsc02.stb.sun.ac.za/STB_PRINT_Q01
NARGA //stbsc03.stb.sun.ac.za/STB_PRINT_Q01
HUMARGA ‐ //stbsc04.stb.sun.ac.za/STB_PRINT_Q01
FIRGA, Library ‐ //stbsc05.stb.sun.ac.za/STB_PRINT_Q01
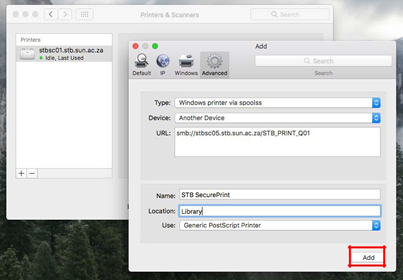
Click on Add.
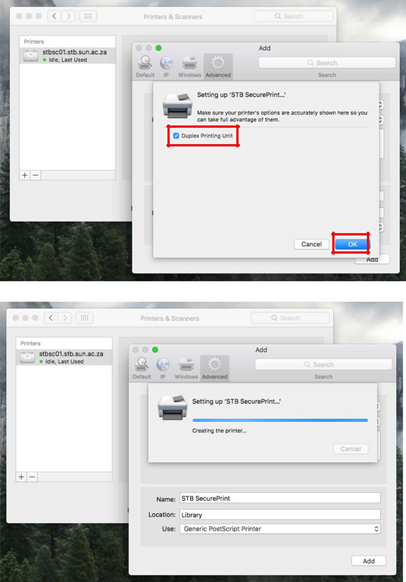
Select Duplex Printing Unit and Click OK.
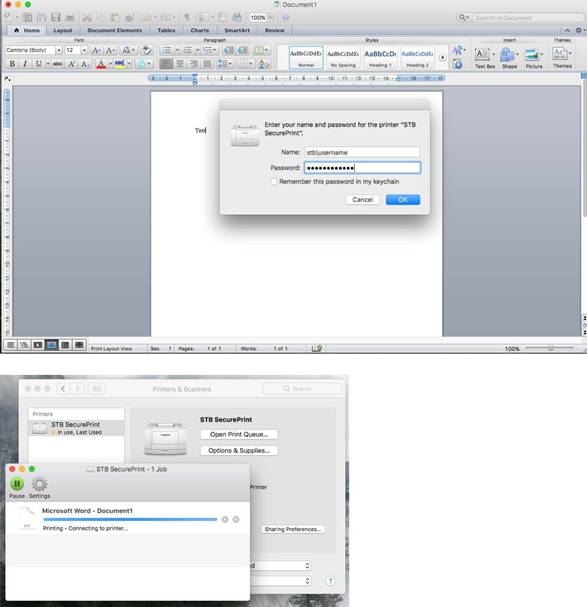
Print a test page and wait for Authentication window to pop up.
12) In the name section enter your Name: stb\username and Password: **********
Related articles