-
Created by
 C Layman on Nov 22, 2022
3 minute read
C Layman on Nov 22, 2022
3 minute read
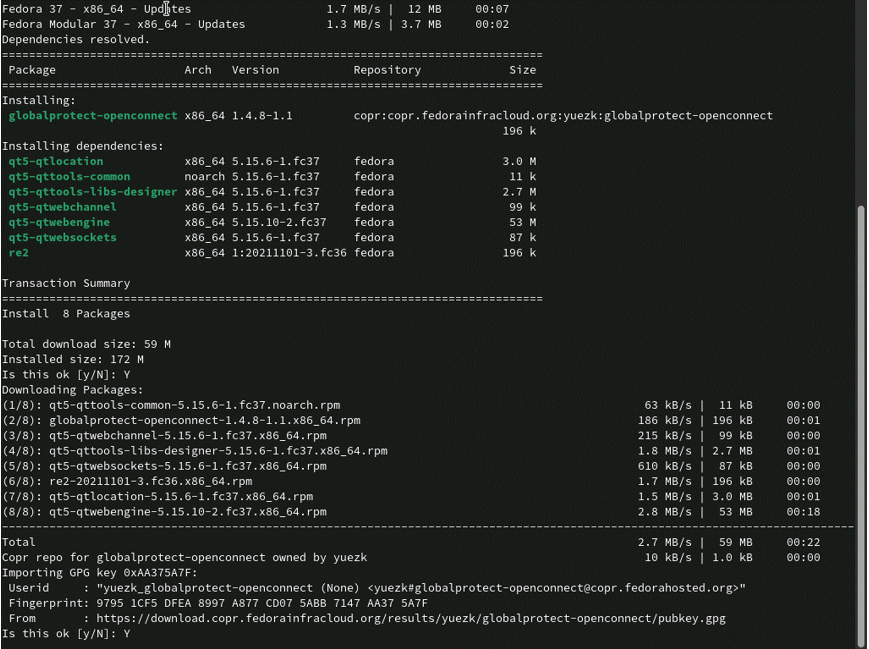
To successfully install Global Protect VPN, please open the terminal and run the commands in the number order stipulated below.
Tip: To ensure that the process complete successfully, manually type out the commands. In addition, we have provided a complete guide with screenshots below detailing the entire setup process.
Step-by-step guide
These steps will be done in Terminal.
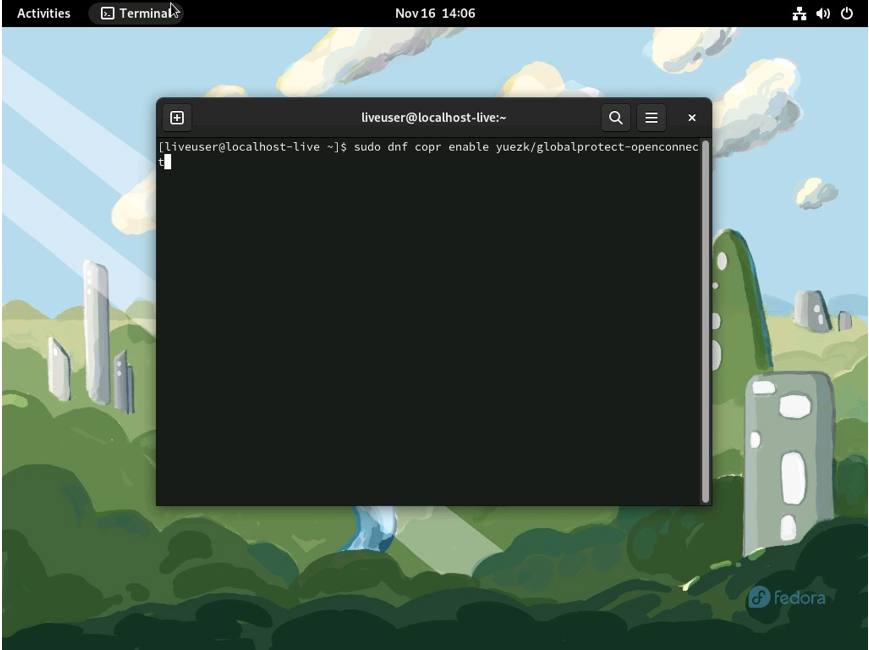
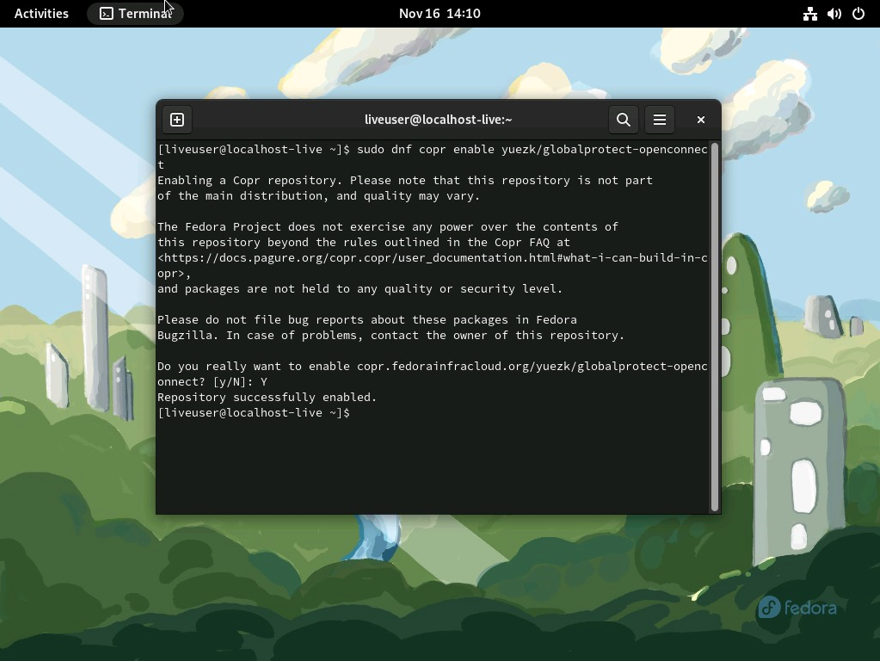
- sudo dnf copr enable yuezk/globalprotect-openconnect
- Press “Y”, then “Enter” to continue
- Type the last command to install Global Protect:
sudo dnf install globalprotect-openconnect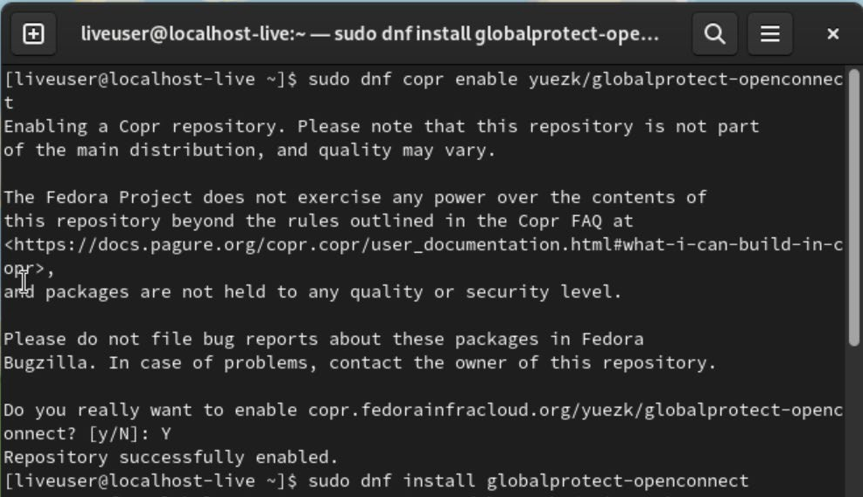
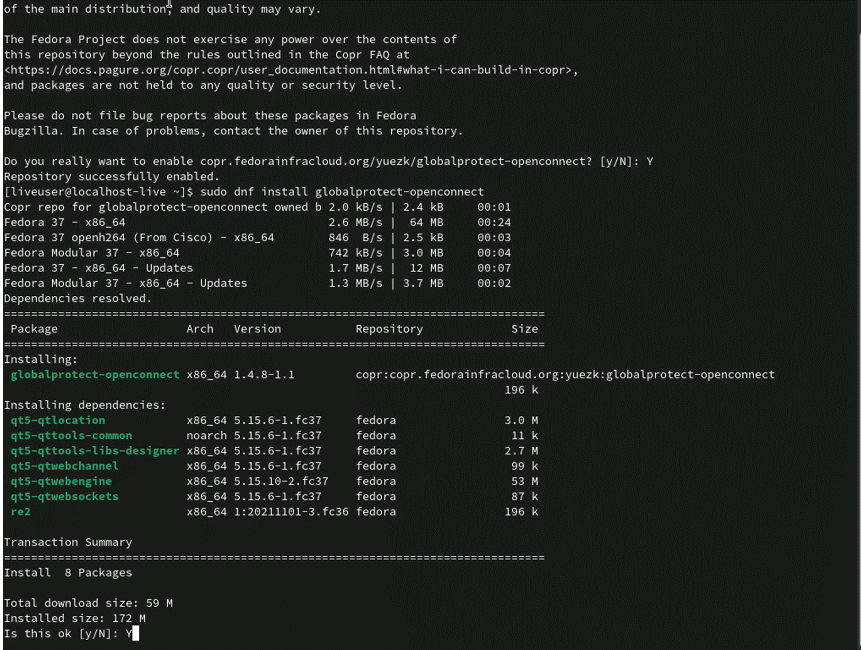
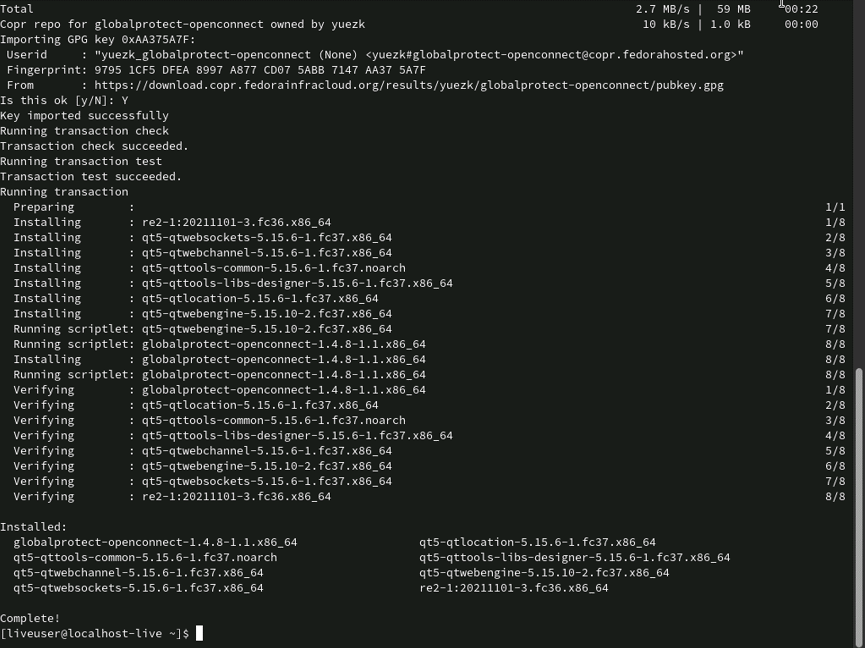
- Confirm the installation by typing “Y” and press Enter.
- Complete install by pressing “Y”
- After installation has completed, please close the below screen and search for the Global Protect VPN software on your Fedora OS device:
- Upon launching the Global Protect app, please enter the following portal address: stbvpn.sun.ac.za. Click “Connect” to continue

- Enter your SU email address. Click on Next to continue.

- Enter your SU email address. Click “Sign in” to continue.

If you have Multi-Factor Authentication (MFA) set up, you will have to verify the SU account using the authentication method you have set up.
Alternatively, Global Protect will automatically be in “Connected” state as indicated below. Note: It is recommended that you set up the Authenticator app for this. See setup link below: Click here to set up MFA on your device using the “Microsoft Authenticator” app:

- Click “Yes” to continue.

Note: The Global Protect VPN app will indicate a “Connected” state. From here, you will be able to access SU network resources remotely.