
...
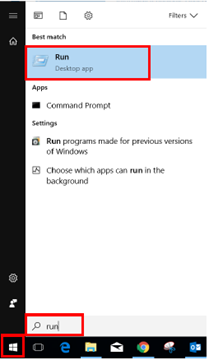
- Click on the Windows icon
- In the search bar, type run

- Select Run (Desktop app)
- In the dialog box, type in the printer you would like to setup (As indicated in the list below)
Staff - \\stbsc01.stb.sun.ac.za\STB_PRINT_Q01
FHARGA – - \\stbsc02.stb.sun.ac.za\STB_PRINT_Q01
NARGA – - \\stbsc03.stb.sun.ac.za\STB_PRINT_Q01
HUMARGA-- \\stbsc04.stb.sun.ac.za\STB_PRINT_Q01
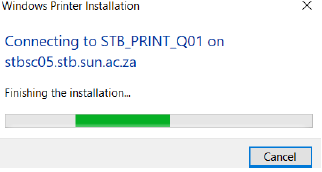
FIRGA, Biblioteek - - \\stbsc05.stb.sun.ac.za\STB_PRINT_Q01
This indicate that the printer is busy installing.

Enter your Student Number \Username and Password as seen below:
Example: stb\username

- When the printer is successfully install, this screen should pop-up.
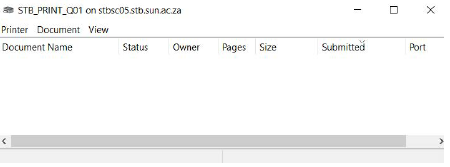
Printer installation will now begin and be complete with the printer queue screen as successfully installed.


To test if the printer successfully prints, follow the instructions below:
Click on the windows icon and go to settings.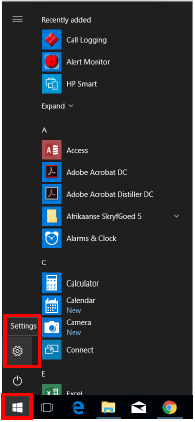

- Click on DEVICES.
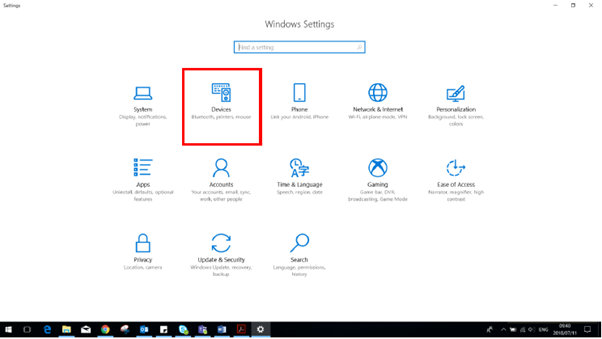
Click on Bluetooth & Device and select Printers & Scanners, the list of printers should then appear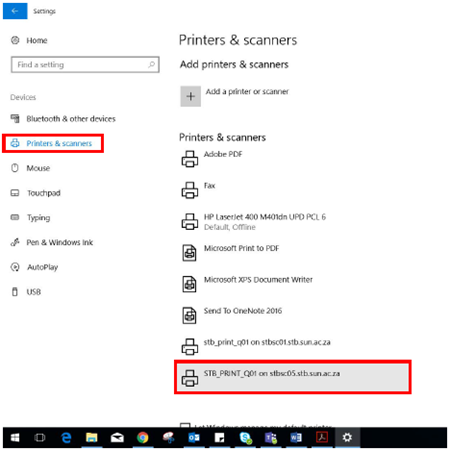
.
- Select the installed printer.
 Click on the printer you installed, then click on Manage.
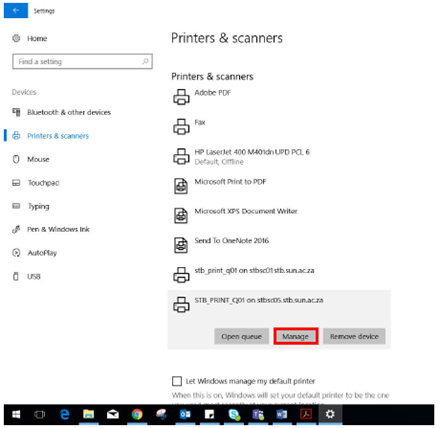
- Click on “Print a test page”.

- Print Queue will appear, and Test Page is sent to Printer.
 To see if your test page is in the queue, click on Open print queue
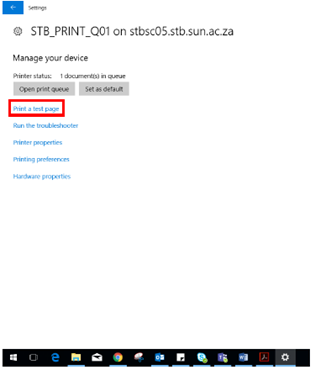
Your Test Page should now reflect in the print queue.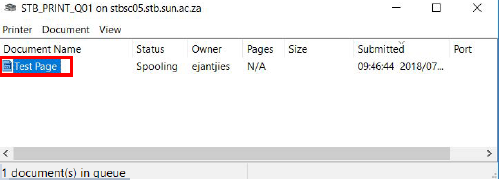
| Info |
|---|
|
...